I got this amazing recipe from Bakerella. I actually made the "in a jar" version of theses cookies give away as Christmas presents last year. But the recipe is sooo good I decided to make some to put in a care package for my boyfriend's son who is going back to college this week (and for myself). They make amazing gifts in a jar or just as homemade cookies.
I keep a few a of these treat boxes around cause you never know when you might need to put together a quick gift. Line the inside with tissue paper and secure with a pretty ribbon.
Showing posts with label treat of the week. Show all posts
Monday, January 21, 2013
Monday, January 7, 2013
Treat of the Week-Flan
Flan is a very popular caramel
custard dessert that is eaten throughout Latin America. Each country has their
little variation of the dessert but usually contains some type of sweetened or
condensed milk, sugar and sometimes eggs. I cheated a little with my flan and
just used the Goya instant mix, but I do have a yummy Cuban recipe that I want
to share with you. I got this recipe from 3 Guys from Miami; their version has
a secret ingredient, lemon rind!
Photo via 3 Guys From Miami
Before you begin you should know for this dessert we use a technique
called a “baño de Maria” or "bain
marie" as it’s known in French
cuisine. It’s basically a water bath or a
double broiler technique which allows the food to heat slower and not cook too
fast and prevents air bubbles. I say this at the beginning because it could
determine what type of mold you use for your flan. The technique basically
involves placing your flan mold inside another larger container filled with hot
water. So make sure you have a container large enough to fit your flan mold. I
use a large aluminum pan (like the ones you use for turkey), fill it with water
about 2 inches deep. The 3 Guys recipe uses individual ovenproof custard
cups for their flan mold, although you can use any heat resistant mold (preferably
aluminum—the sturdy kind not the disposable kind). I pour my flan
mixture into a round aluminum cake mold, and set it inside the larger turkey
pan with the water (you can use a heat proof plate or a small cooling rack help
stabilize the mold in the water). Once you get this down the rest is easy.
Photo via Foodielady
INGREDIENTS:
1 lemon rind, carefully pared
1 cup milk
1 cinnamon stick
3/4 cup sugar (for the caramel)
8 whole eggs
1 cup sugar (for the custard)
2 cups heavy cream
1 cup milk
1 cinnamon stick
3/4 cup sugar (for the caramel)
8 whole eggs
1 cup sugar (for the custard)
2 cups heavy cream
INSTRUCTIONS:
Preheat oven to 350 degrees F.
Carefully remove the outer rind from a lemon. Don't cut too deep or
you'll cut into the pulp! You just want the outer, mostly yellow layer!
Scald the milk by bringing it quickly to a boil with the lemon rind and
cinnamon stick, stirring constantly. Remove from heat and let stand for 15
minutes. Remove lemon rind and cinnamon stick after the milk cools.
Now for the caramel (which is the
trickiest party I think). Heat 3/4 cup
sugar in the bottom of a metallic pan at medium-low heat until it begins to
melt. The sugar will turn into a thick syrup with a dark brown color. The
key is to let it melt it gradually and stir it constantly to prevent burning!
Quickly remove from heat and pour into each one of your individual
custard cups (or whatever mold you’re using). Tilt back and forth to cover the
bottom and sides of the dish. The syrup will harden as it cools to form a thick
shell. During the baking process, this shell magically transforms itself into a
delicious dark caramel syrup.
For the custard, beat the eggs and 1 cup sugar on medium speed with an
electric mixer until thoroughly mixed and frothy; stir in the warm milk and the
cream. Pour into the caramel-lined mold(s) and set it into a baño de Maria
(a.k.a. water bath, a.k.a. double broiler).
Bake for 1 ½ hrs or until a knife comes out of center clean. Remove the
flan mold from the baño de Maria and let it cool in the dish. It can be eaten
warm but I like mine cold so I let refrigerate after it cools.
Before serving, loosen sides with a knife and flip onto your serving dish. Dust with a little cinnamon or nutmeg (optional).
Tuesday, January 1, 2013
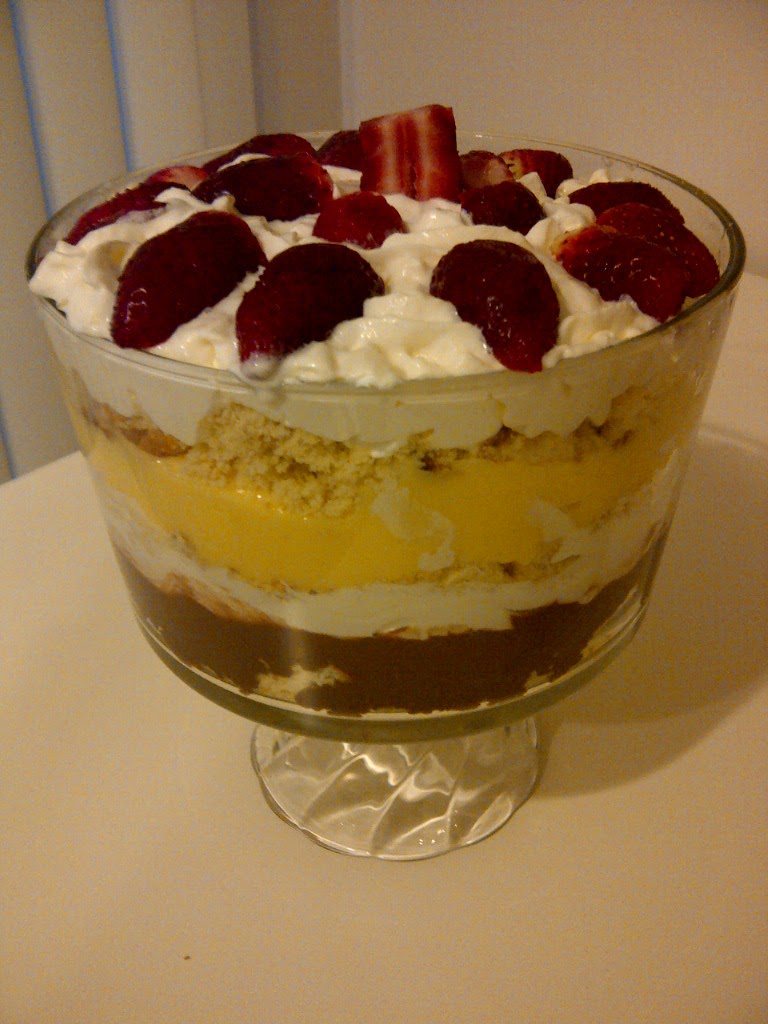
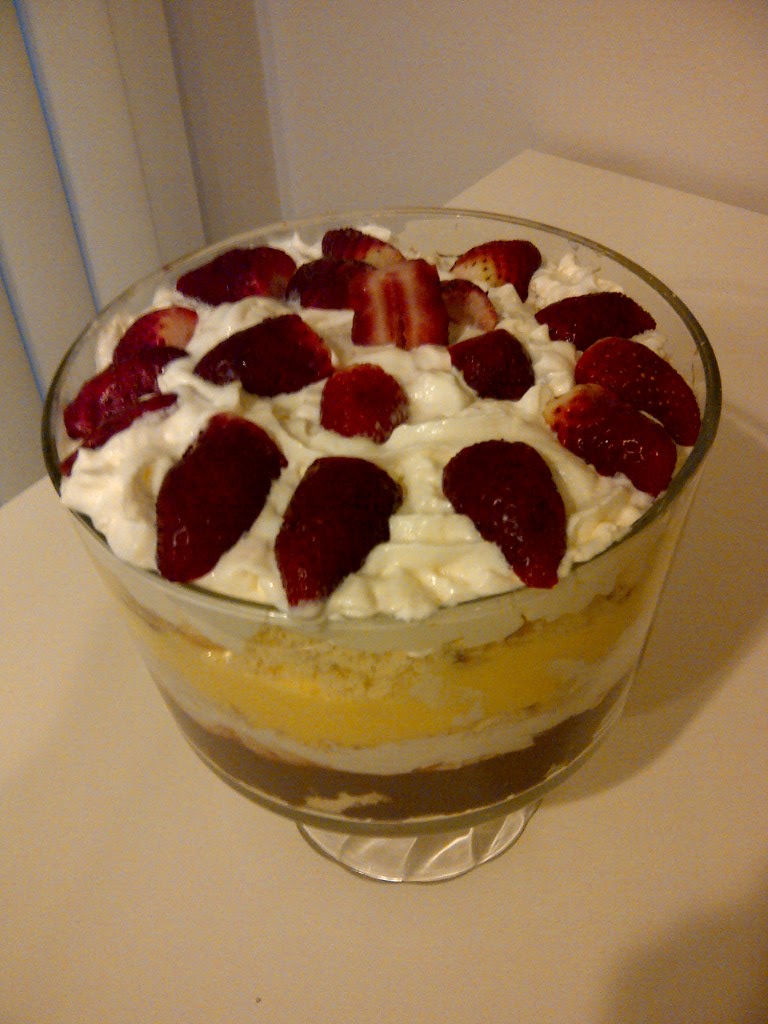
Treat of the Week-Layered Strawberry Trifle
Happy New Year!
Here is my treat for the week. I had some leftover strawberries and whipped topping from a Christmas dessert I made last week and decided to hurry up and use them before they spoiled. This is a super simple dessert that my mom taught me to make years ago and it seemed like a perfectly lazy way to use these leftover ingredients.
Here is what you will need:
fresh strawberries (or any fruit)
1 tub of whipped topping
1 can of whipped topping
a small yellow cake, vanilla cake or sponge cake (prepared)
vanilla pudding (prepared)
chocolate pudding (prepared)
Instructions:
Prepare vanilla pudding and chocolate pudding according to package instructions. Let cool (I let mine refrigerate overnight). Prepare cake mix according to package instructions. I didn't have a box of cake mix laying around so I made a batch of vanilla cake from a simple recipe I have. Let cake cool. In a trifle bowl (or any other large glass bowl), use your hands to crumble the cake until you have a 1/2 inch thick layer of cake crumbs at the bottom. Choose either one of the puddings and pour on top of the cake. Using a spoon or spatula, spread it out evenly towards the edges being careful not to smear the sides of the bowl so that your layers look defined. Add whipped topping from the tub using the same technique. Add another layer of crumbled cake. If you have enough strawberries (I didn't so I skipped this step) add a layer of sliced strawberries now. Now add the second pudding. Finally, use the whipped topping from the can to make a pretty layer of whipped cream at the very top. Start on the outside work your way towards the middle using a circular pattern. Place sliced strawberries on top in any kind of pattern you like.
This is a very simple dessert to make and you can get very creative with it. Feeling lazy? Cut out half of the work by just buying pre-made pound cake or sponge cake and jello pudding cups. This trifle is also very diet-friendly since you can choose to make it with sugar-free jello pudding and light whipped cream. Buen Provecho!
Here is my treat for the week. I had some leftover strawberries and whipped topping from a Christmas dessert I made last week and decided to hurry up and use them before they spoiled. This is a super simple dessert that my mom taught me to make years ago and it seemed like a perfectly lazy way to use these leftover ingredients.
Here is what you will need:
fresh strawberries (or any fruit)
1 tub of whipped topping
1 can of whipped topping
a small yellow cake, vanilla cake or sponge cake (prepared)
vanilla pudding (prepared)
chocolate pudding (prepared)
Instructions:
Prepare vanilla pudding and chocolate pudding according to package instructions. Let cool (I let mine refrigerate overnight). Prepare cake mix according to package instructions. I didn't have a box of cake mix laying around so I made a batch of vanilla cake from a simple recipe I have. Let cake cool. In a trifle bowl (or any other large glass bowl), use your hands to crumble the cake until you have a 1/2 inch thick layer of cake crumbs at the bottom. Choose either one of the puddings and pour on top of the cake. Using a spoon or spatula, spread it out evenly towards the edges being careful not to smear the sides of the bowl so that your layers look defined. Add whipped topping from the tub using the same technique. Add another layer of crumbled cake. If you have enough strawberries (I didn't so I skipped this step) add a layer of sliced strawberries now. Now add the second pudding. Finally, use the whipped topping from the can to make a pretty layer of whipped cream at the very top. Start on the outside work your way towards the middle using a circular pattern. Place sliced strawberries on top in any kind of pattern you like.
This is a very simple dessert to make and you can get very creative with it. Feeling lazy? Cut out half of the work by just buying pre-made pound cake or sponge cake and jello pudding cups. This trifle is also very diet-friendly since you can choose to make it with sugar-free jello pudding and light whipped cream. Buen Provecho!
Sunday, December 23, 2012
Treat of the Week-Christmas Cookies in a Jar
I made these treats in a jar to give as Christmas gifts. They're great for those miscellaneous gifts that always forget (teacher, bus driver, neighbor) they also make awesome party favors for dinner guests.
Of course I tried making the cookies for myself and they are awesome! Find out how to make this festive treat here.
I used some twine, scraps of Christmas-print fabric and the free printable tags from Less Ordinary Designs to make my treats cheery and bright.
Also, check out this peppermint hot chocolate gift in a jar.
Get the recipe, instructions and cute North Pole Survival Kit free printables here.
Give em a try...
Of course I tried making the cookies for myself and they are awesome! Find out how to make this festive treat here.
I used some twine, scraps of Christmas-print fabric and the free printable tags from Less Ordinary Designs to make my treats cheery and bright.
Also, check out this peppermint hot chocolate gift in a jar.
Get the recipe, instructions and cute North Pole Survival Kit free printables here.
Give em a try...
Friday, December 7, 2012
Treat of The Week-Chocolate Peppermint Cookies
Okay, I’m trying to make a different treat or dessert every week. Sort
of like a Julie and Julia thing but with different recipes from different
sources...and I’m not trying to prove anything. I’m loving it, my family and
co-workers that get to sample a new treat every week are loving it…but my hips and thighs
are suffering! Oh well, que sera sera.
The rest of the recipe went pretty smoothly. I should mention that I ghetto-rigged (http://www.urbandictionary.com/define.php?term=ghetto%20rigged) the peppermint bark pieces by putting a bunch of Peppermint Hershey’s Kisses in my Ninja blender and pulsing it until I had chopped pieces. Don’t laugh! Again, I’ll blame this one on the grocery store for not having enough peppermint bark. After searching high and low, the only kind I could find were Ghirardelli Squares for like $6 a pack—uh yeah right! So Peppermint Hershey’s Kisses in the blender is what I ended up with.
I adapted this recipe from Cookie Swap by Lauren Chattman:
Ingredients
4 oz unsweetened chocolate finely chopped
8 oz semisweet or bittersweet chocolate finely chopped
½ cup (1 stick) unsalted butter cut into pieces
½ cup unbleached all-purpose flour
½ tsp baking powder
½ teaspoon salt
4 large eggs
1 ½ cups of sugar
1 ½ tsp pure vanilla extract
1 ½ cups chopped peppermint bark
Directions
1.
Preheat oven to 350⁰F. Line several baking
sheets with parchment paper.
2.
Put water to a depth of 1 inch in the bottom of
a double boiler or medium saucepan set over low heat and bring to a bare
simmer. Combine the unsweetened chocolate, semisweet chocolate, and the butter
in the top of the double boiler or in a stainless steel bowl set on top of the
simmering water, making sure that the water doesn’t touch the bottom of the
bowl. Heat whisking occasionally, until the chocolate and butter are completely
melted. Set aside to cool slightly.
3.
Combine flour, baking powder and salt in a small
bowl.
4.
Place eggs and sugar in a large bowl and beat
with an electric mixer on high until they are thick and pale (about 5 minutes).
Add the chocolate mixture and vanilla and beat on low until smooth. Add the
flour mixture and beat until just combined. Stir in the peppermint bark. Place
the bowl, uncovered, in the refrigerator to let the dough firm up, for 15
minutes (or up to 6 hours).
5.
Drop the dough by the heaping tablespoon onto
the prepared baking sheets, leaving about 3 inches between each cookie.
6.
Bake the cookies until the tops are cracked and
shiny, 10-12 minutes. Carefully slide the parchment paper with the cookies to a
wire rack and let the cookies cool completely.
O.k. so that was the “right” way to do it.
Lemme tell you how it went down in my kitchen…
First of all ,they grocery store didn’t
have any solid unsweetened chocolate so I ended up having to buy powdered chocolate
instead. No problem...I thought; I’ll just weigh it out on the scale so that I
have 4 oz. like the recipe calls for. BUT, I didn’t read the instructions on
the container. There were special instructions for using the chocolate powder as baking chocolate.
Duh!
So when I heated everything together I ended up with a hard, dry, hot
mess! It didn’t look right so eventually I figured out what I did wrong and
added the oil to the mixture. Voila! Now it looked like melty, gooey, yummy
chocolate that dripped off the spoon. Ummm, it took everything in me not to
start dipping strawberries in it and just forgo the cookies all together for chocolate
fondue!
Next challenge...this double broiler thing is
a b*tch! Especially since I didn’t have a double broiler and I opted to go
with the stainless steel bowl in some water method. I ended up just plopping the bowl
into a pot of boiling water because it was impossible to find a bowl and a pot
the correct size so that the bowl could magically hover above the boiling water
without touching it! Note to self: buy a double broiler thingamajigy. The rest of the recipe went pretty smoothly. I should mention that I ghetto-rigged (http://www.urbandictionary.com/define.php?term=ghetto%20rigged) the peppermint bark pieces by putting a bunch of Peppermint Hershey’s Kisses in my Ninja blender and pulsing it until I had chopped pieces. Don’t laugh! Again, I’ll blame this one on the grocery store for not having enough peppermint bark. After searching high and low, the only kind I could find were Ghirardelli Squares for like $6 a pack—uh yeah right! So Peppermint Hershey’s Kisses in the blender is what I ended up with.
They came out awesome; I'm obviously not a food photographer because the pics don’t do
them justice!
Very chocolaty...the cookie recipe itself is a keeper and sans
the peppermint would yield cookies to satisfy any chocolate addict. And I’ve
already gotten requests to make them again substituting the peppermint with
white chocolate chips or chocolate chunks next time. Wooo Whooo!
Saturday, December 1, 2012
Treat Of The Week-Blueberry and Apple Pies
Well, in this case it’s more like treats of the week. I
had some leftover pie crust from Thanksgiving. I cheated a little and used
Pillsbury Refridgerated Pie Crust, but the pies came out amazing nonetheless. I used this
recipe from food.com for the blueberry pie filling. What I liked the most was
that it wasn’t overly sweet and you could really taste the
blueberries. I actually used frozen blueberries since fresh ones are a little
hard to find this time of year. Could NOT taste the difference! I didn’t
tell anybody about the frozen berries and everyone commented on how “fresh” the
pie tasted.
I made apple pie tarts for Thanksgiving and
used that same recipe for my apple pie filling below. The only thing I changed from
the dessarts.com recipe was that I used a regular pie mold instead of a muffin
pan. I also let the filling and spices macerate in the fridge overnight which
really helped all the flavors blend together. A star-shaped
cookie cutter helped make the top crust.
Tip: Place foil around the edges of the pie to keep the edges from burning if the middle needs to cook a little longer.
Both recipes were really pretty simple and muy delicioso!
Subscribe to:
Posts (Atom)